Hi everyone, new user here.
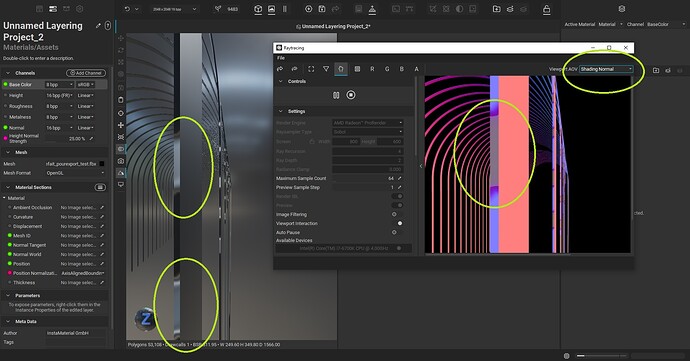
Hope this wasn’t discussed previously, I just imported a mesh from Blender I modeled, everything is fine there, no issues, but as soon as I import it in Instamat as a layering project I get these weird gradients showing in the shading. It should all be flat, like a dark grey in this particular case. I did a raytracing render and as you can see, this is a “normal shading” issue, because it doesnt display on any other AOV.
Any idea where it might come from and on how to fix that ?
Thanks in advance
Hello @Stefdln and welcome to our community!
Thanks for your patience as some of the team was out of the office for the holidays.
Would you be willing to provide the mesh for us to test with internally? You can send it privately with a DM or publicly here.
Thanks!
Hi Pixby
Thanks for your feedback
Actually I had a hard time figuring out what was going on but I found out I had overlapping uvs in my base model, I thought I had the uvs unwrapped just fine at first but it wasnt the case.
I actually had another problem regarding this particular project, but it’s something a bit different. Should I make a new post or should I post it here?
Thanks in advance
Hi @Stefdln,
Glad you were able to determine the cause of the behavior. As for the other problem you mentioned, feel free to do either option. You can create a new post, or continue here since it is related to the same file.
Thanks!
Alright thanks
So basically I imported my mesh in a layering project.
I baked a few maps, among them the AO map.
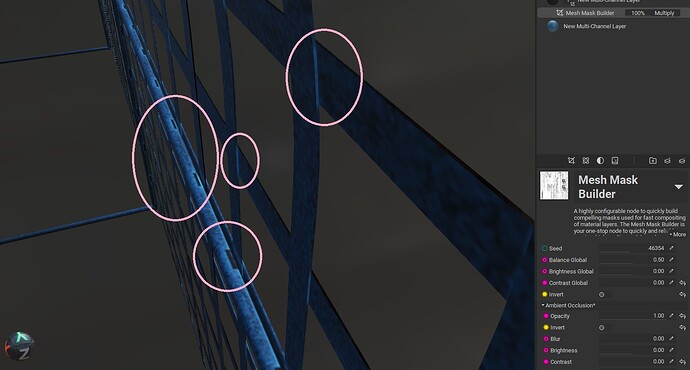
The object is very large in itself, so I’m aware it is not hires enough, but the look of the AO seems strange. It has bright spots everywhere, I’ve tried to change a few parameters before baking but to no avail, it always looks the same on this particular file. I know it’s not the same thing, but the non-baked AO shader in Blender looked just fine. Do you have an idea about what’s going on and what I might be doing the wrong way ?
Thanks in advance
Hello @Stefdln,
It’s hard to say exactly without a closer look at the file, however some things come to mind:
- When adjusting the baking settings, did you try decreasing the
Outwards Ray Length in %andInwards Ray Length in %parameters? - It’s possible that the UV shells are too close together and need some additional padding. You could use InstaMAT Studio to automatically unwrap the UVs of the mesh and increase the
Gutter Size in Pixelsparameter to add more padding around the shells. Here’s an article from our documentation on how to unwrap UVs with InstaMAT: Automatically Unwrap a Mesh's UVs with the Mesh UV Unwrap Node | InstaMAT Documentation. - Some dilation or solidification can be applied. This can happen during export with the Image and Data Output Export panel with the
Dilation in Percentparameter. Or in an Element Graph by dragging the layering project from the Package Management panel into the graph, then using theMaterial Solidifynode. You can supply a mask for theMaterial Solidifynode by enablingUse Mask, then dragging the mesh into the graph, and using theMesh Masknode.
If you have any questions, please feel free to ask. ![]()
Thanks!
Thanks so much for your detailed answer, I tried the first solution but to no avail, but didn’t even know about the last two. I will give it a try. If anything goes wrong I will send you the model if you’re interested. Thanks again

