Hi, I would like to know what is the proper workflow to import a mesh from blender for texturing in instamat.
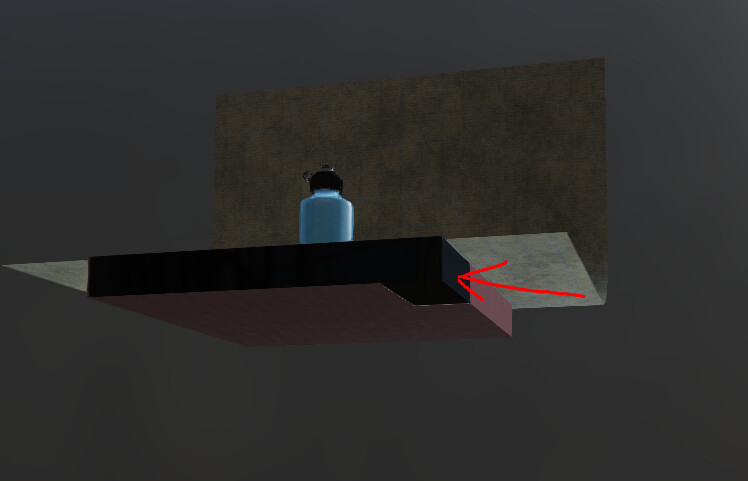
So far I can’t seem to get it to work decently. I export an fbx with assigned materials UV unwraped (otherwise materials get stretched) and object names for each part → create layering project → import the FBX. Problem is that some parts of the objects are completely shiny black and I noticed that they follow similar paterns of empty spaces in the UV maps. Some other objects are directly completely dark and can’t get the material to work on them.
I agree with @debe, it would be helpful to see your layer stack configuration and to ensure all meshes are properly masked. Also if your able to, you could provide the .IMP file containing the layering project and the meshes for us to take a look internally.
Than you so much for your replies It’s almost there.
With the projection mode set to to UV got solved some issues; But now I see a related problem mentioned by @Pixby, the mesh mask filters do not correlate with the Blender mesh names.
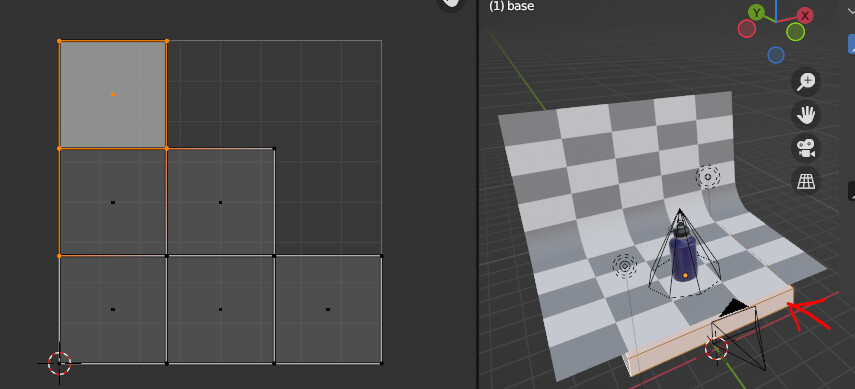
Specifically the ones named circle, base, corrugado tapa and tela.
Circle: it’s just a circle with no faces so I think it should’t even have a mesh but instead it got swaped somehow with “base”, now instamat thinks that the mesh corresponding to “circle” is the “base”. Base: got swaped with the “tela mesh”, it should be the rectlangle “base mesh”. Corrugado tapa: Does’t include the last part of the material that should be there, looking the missing part as a shiny black.patch; the behavior I expected was that it assigns the light grey that is on the rest of that piece.
Note: The rest of the mesh masks are working and correlated as expected.
Thanks for your patience @universalcitizen while we continue to look into this.
Could you provide us with a screenshot of your Blender setup for the scene? I was able to reproduce the behavior with the mesh mask not correlating with the mesh names.
By removing the empty meshes and the circle mesh from the scene, the mesh mask appeared to be functioning correctly matching the proper names to the corresponding meshes.
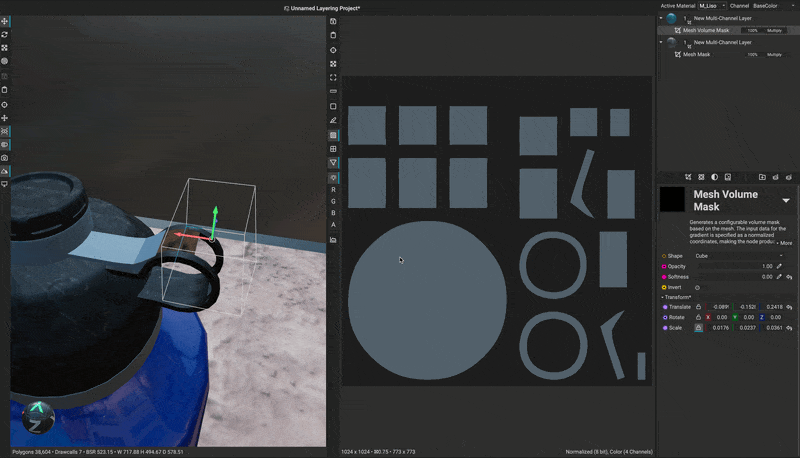
Regarding the Currugado tapa mesh. It’s possible that there are no UV coordinates assigned for that particular part of the mesh. Notice how when I place the volume mask over that particular section, none of the UVs show the masked area.
We will continue to investigate the mesh mask behavior.
After bringing this up internally, it looks like the issue with the Mesh Mask corresponding to the proper submeshes in the scene will be fixed in the next update. In the meantime, I recommend removing the empty objects and the circle points object from the scene before importing it into InstaMAT Studio.
If you have any further questions, please feel free to ask!
Sorry for the response time I’m actually learning this software in my free time, and I have little to no knowledge of texturing programs such as substance painter, but I decided to give myself the opportunity to learn instamat because the prizing and also some features I saw in the presentation that look very promising. So yeah I’m kind of a noob.
After saying that, you were right! the problem was that I didn’t unwrapped that part, but even so I think it should have work when disabling the mesh mask and using “tri planar” projection mode, but it didn’t. what are your thoughts about this?
here is a video of the blender scene, confirming your previous guess.
Additionally, regarding to your solution of removing the empty meshes, how did you remove them within Instamat? Or I guess you could have exported the FBX from Instamat → Delete them in 3rd party program → reimport without the empty meshes.
Thanks in advance for all the help, it’s been really useful.
No worries at all! I hope you are enjoying learning InstaMAT.
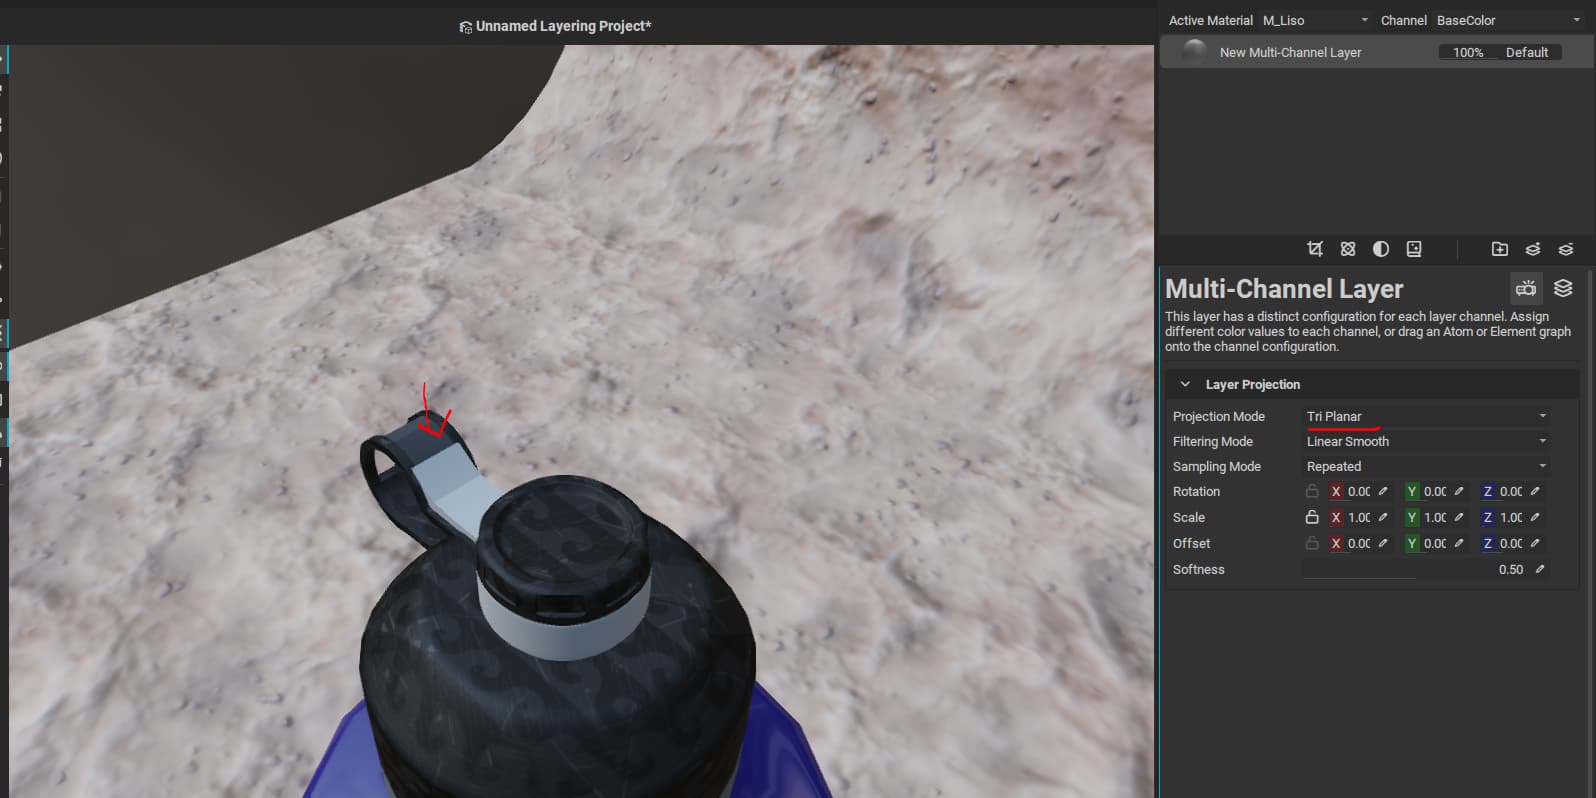
Regarding your question about Tri Planar projection, in order for texture information to be applied to the mesh, UVs for the object must be unwrapped. Tri-planar projection is a method that applies textures to a mesh while minimizing seams, though the textures still require information about their proper placement on the mesh.
Regarding removing the empty meshes, in this case, I removed them by importing the model into another application, then used InstaMAT’s reimport feature. To reimport a mesh, in the Package Management panel, right-click the mesh and in the contextual menu choose either Reimport or Reimport From to select the new version of the mesh. InstaMAT will automatically replace the mesh in any project that references it.
I’m glad to hear my help has been useful! If you have any other questions, please feel free to ask.