MAT makes it easy to create dynamic data-driven export templates. For instance, you could add watermarks to your export, export a variation that applies a HSL/HCL rotation or - as I’ll show in this post, invert the Mask output project.
If you don’t want to do this tutorial, you can find the IMP attached to this post.
Creating the Output Converter Element
First, create a new Element Graph project. The following steps are important, this is how MAT recognizes your element as a converter!
Assign the category Internal/Converter and name it Mask to InvertedMask the name is important as well MAT will recognize the X to Y as what data needs to be assigned. In this case the data-driven input is the Mask output from any project - whether layering or canvas based.
With that done, we can now create the input and output parameters. Again, the names matter, so we create the input exactly as Mask and the output exactly as InvertedMask - both should be grayscale images. Then, let’s create a “Invert” node and assign our input to it, the output will be assigned to the output channel. It should look like this:
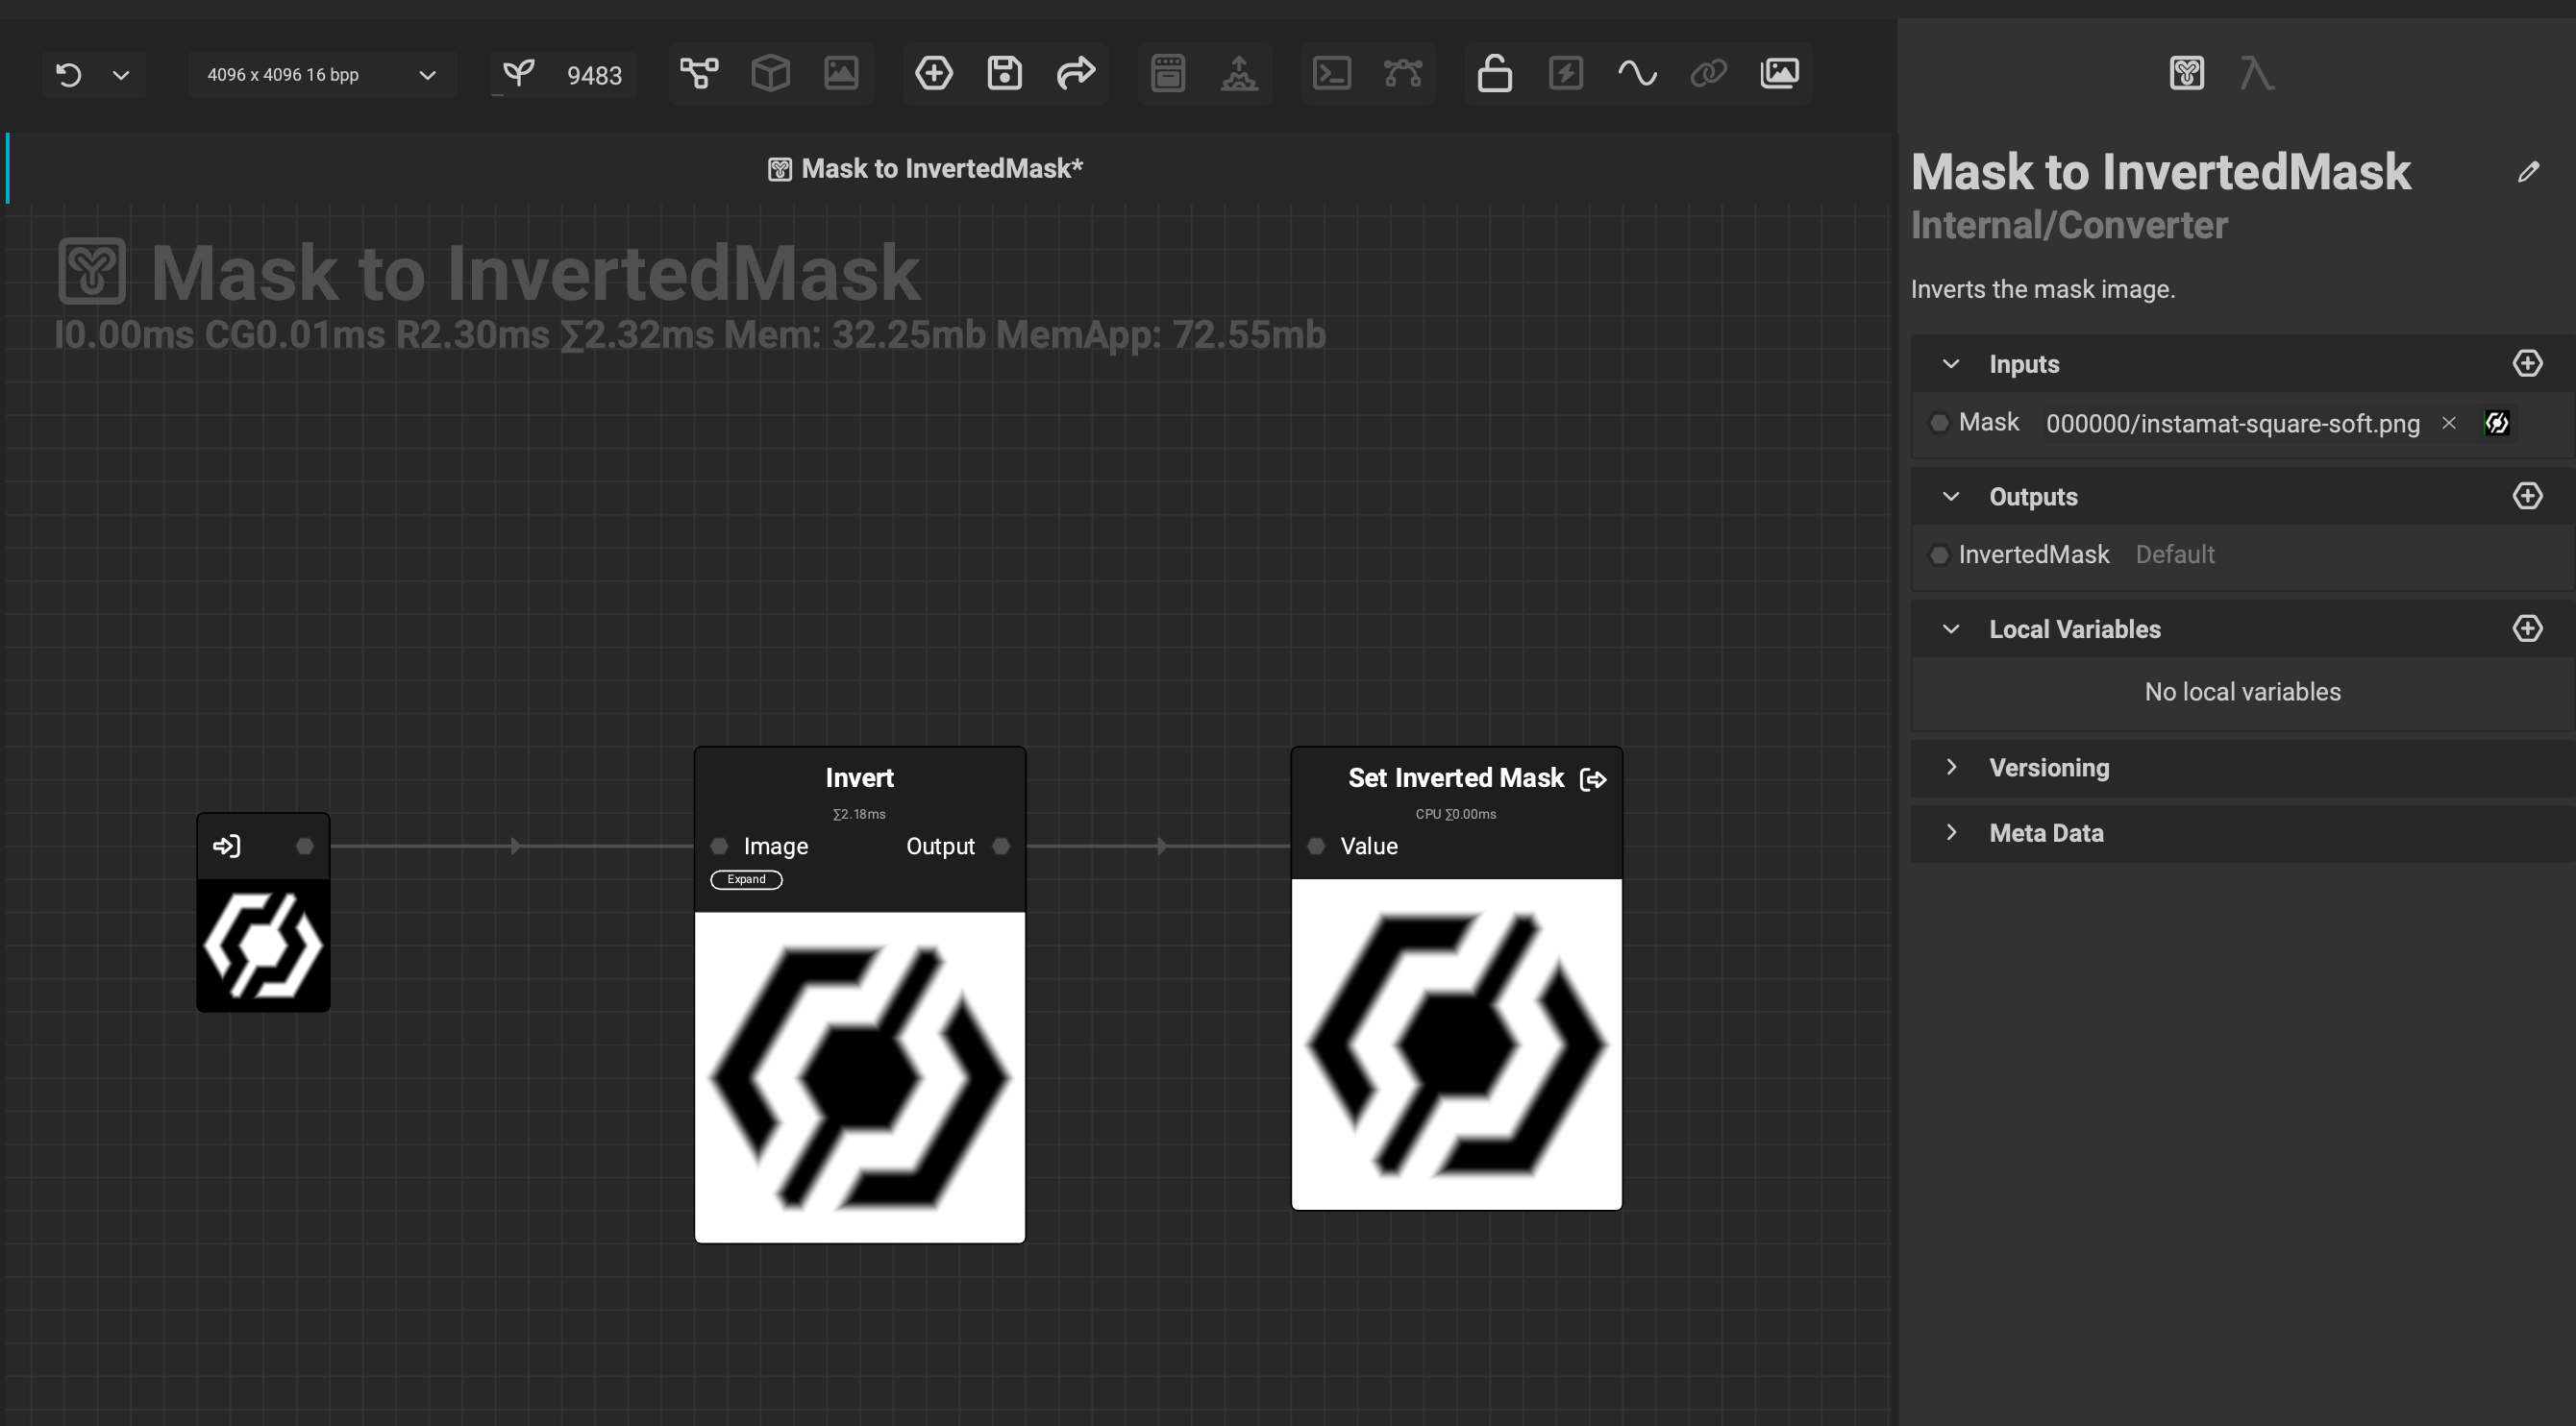
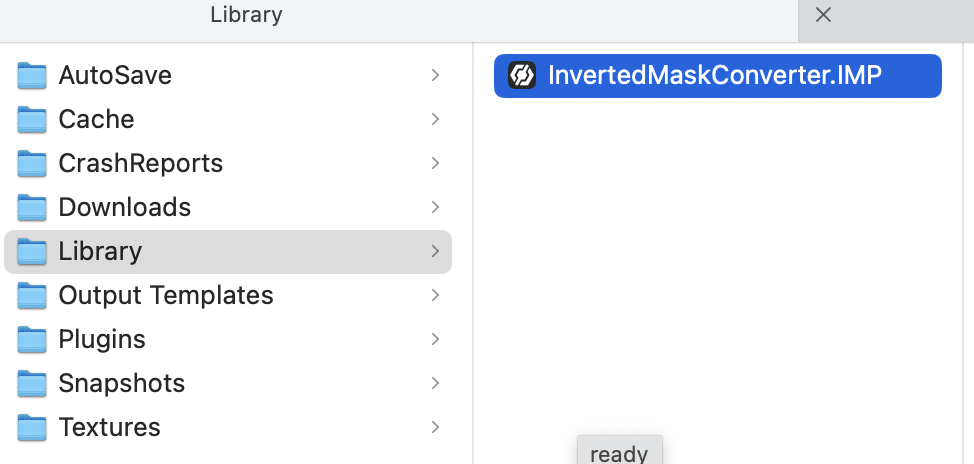
That’s it - we’re almost done. Now, you’ll need to save the in our user library at ~/Documents/InstaMAT/Library/InvertedMaskConverter.IMP
Now all we have to do is restart MAT.
Setting up the Converter in the Export Template
Let’s load a project and open the export dialog.
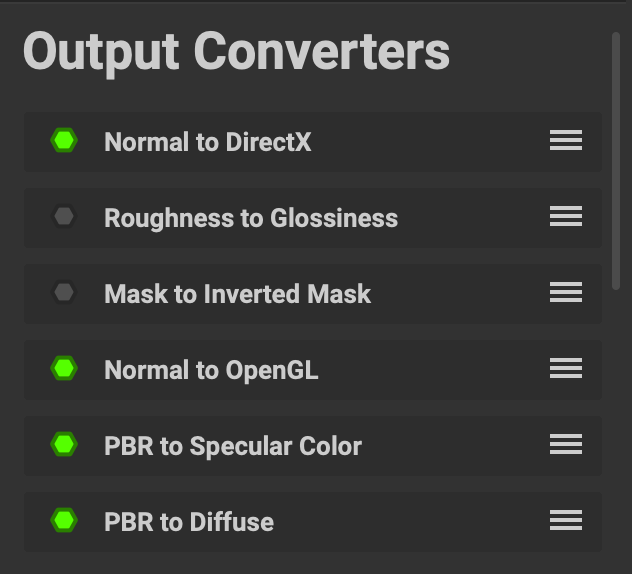
You should now see the new converter in the list:
There it is! All we have to do now is assign to an output channel:
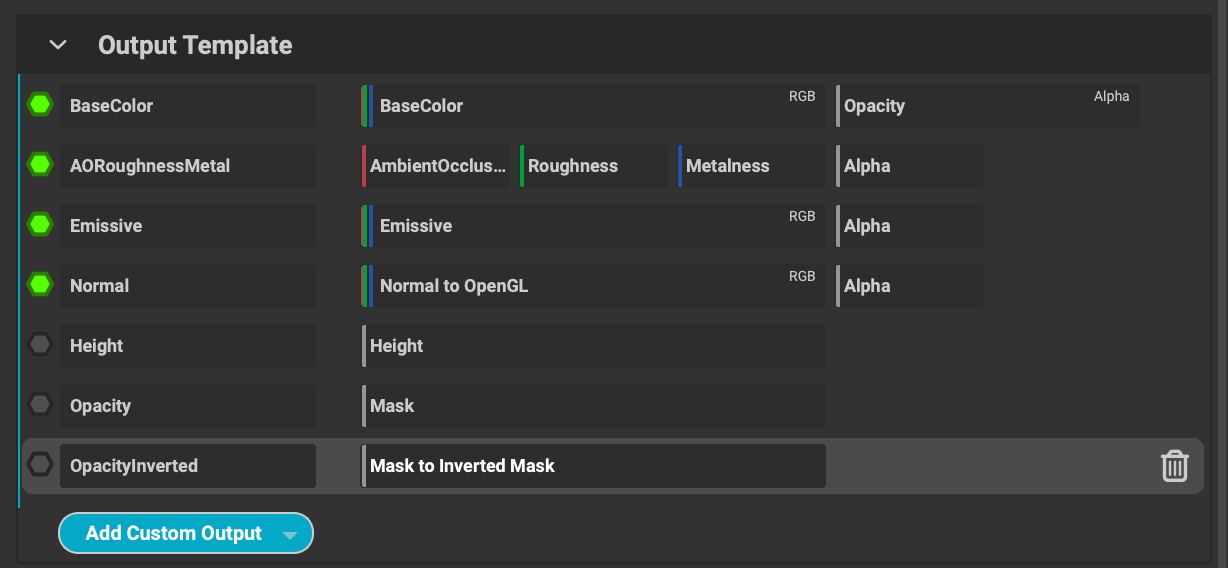
In the above screenshot, I have created a
Custom Output of type Grayscale then I dragged the converted onto the output.
Testing the Converter Export
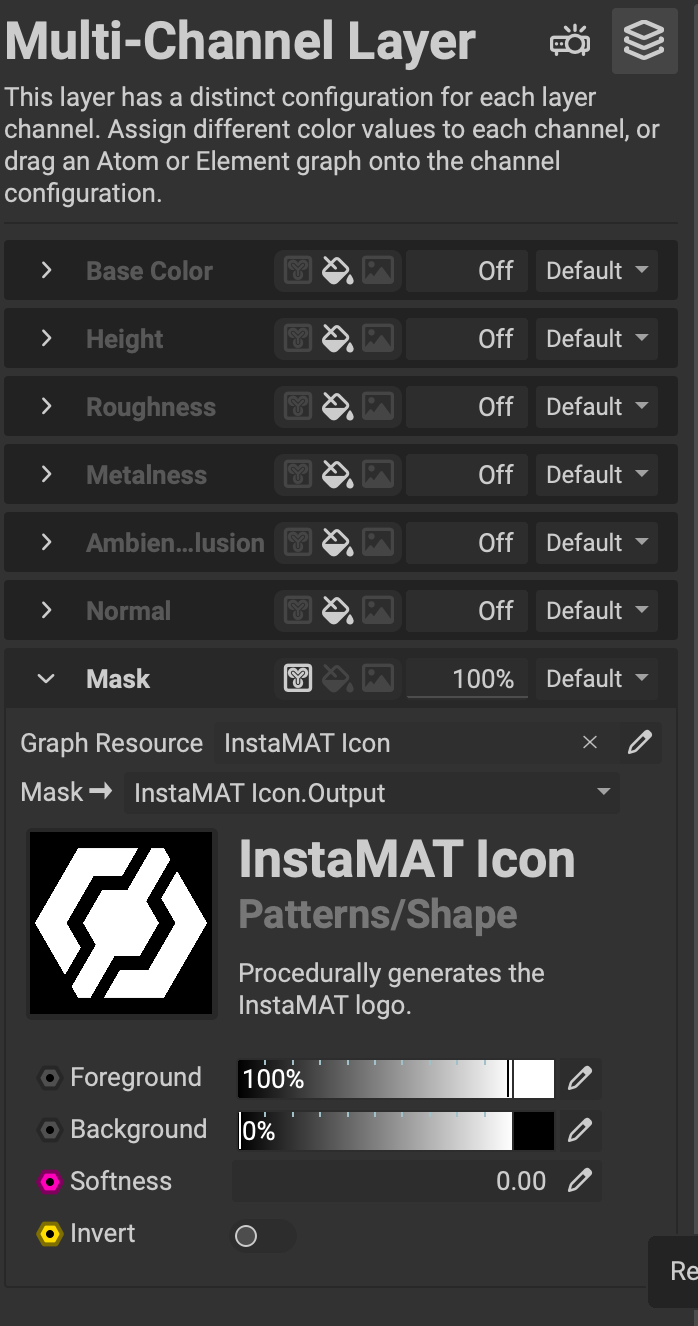
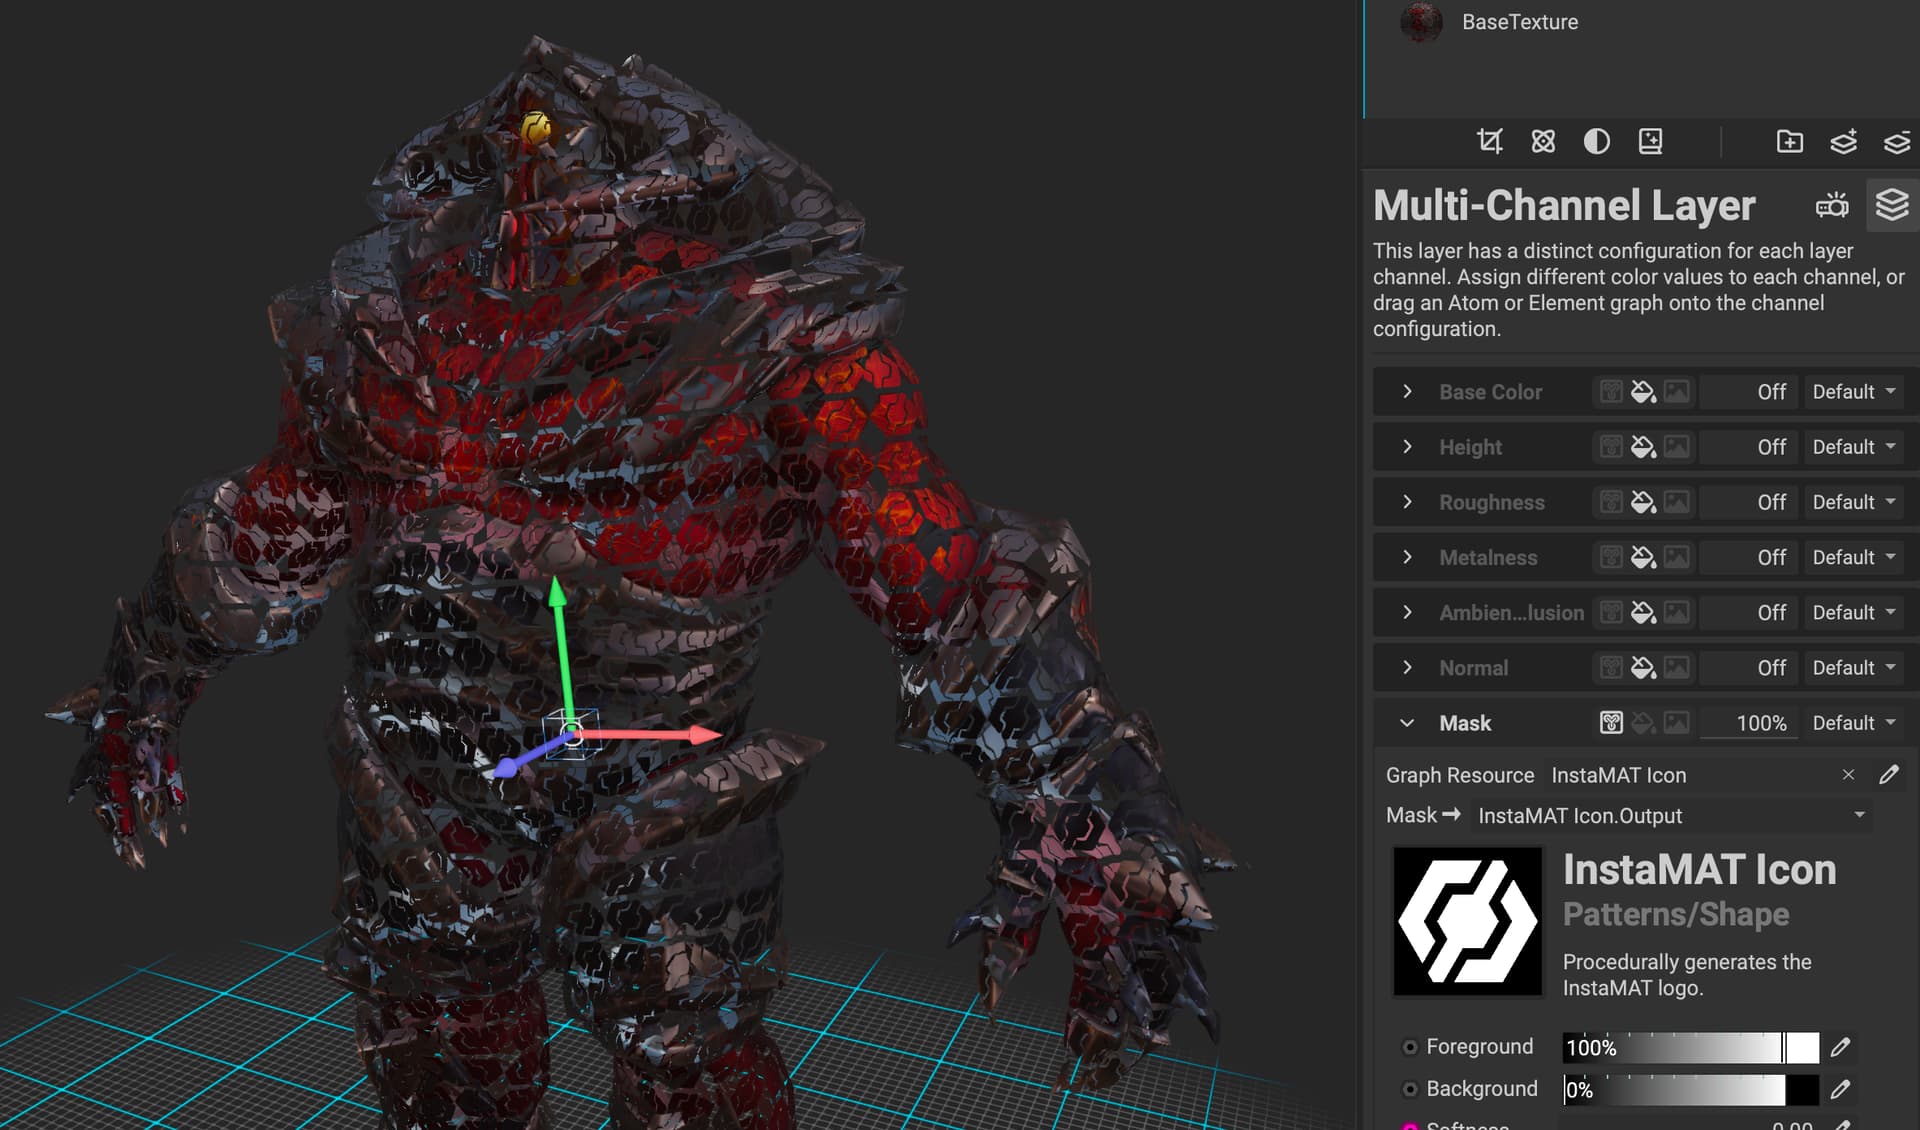
Create a new layering project and add a “Mask” channel to your project.
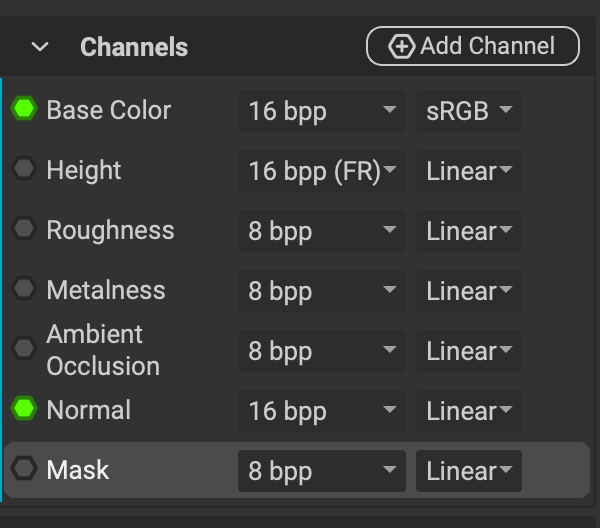
In the layer stack I assign the InstaMAT Icon graph to the Mask channel and disable all other outputs.
I’ve setup the projection so it nicely tiles over the mesh,
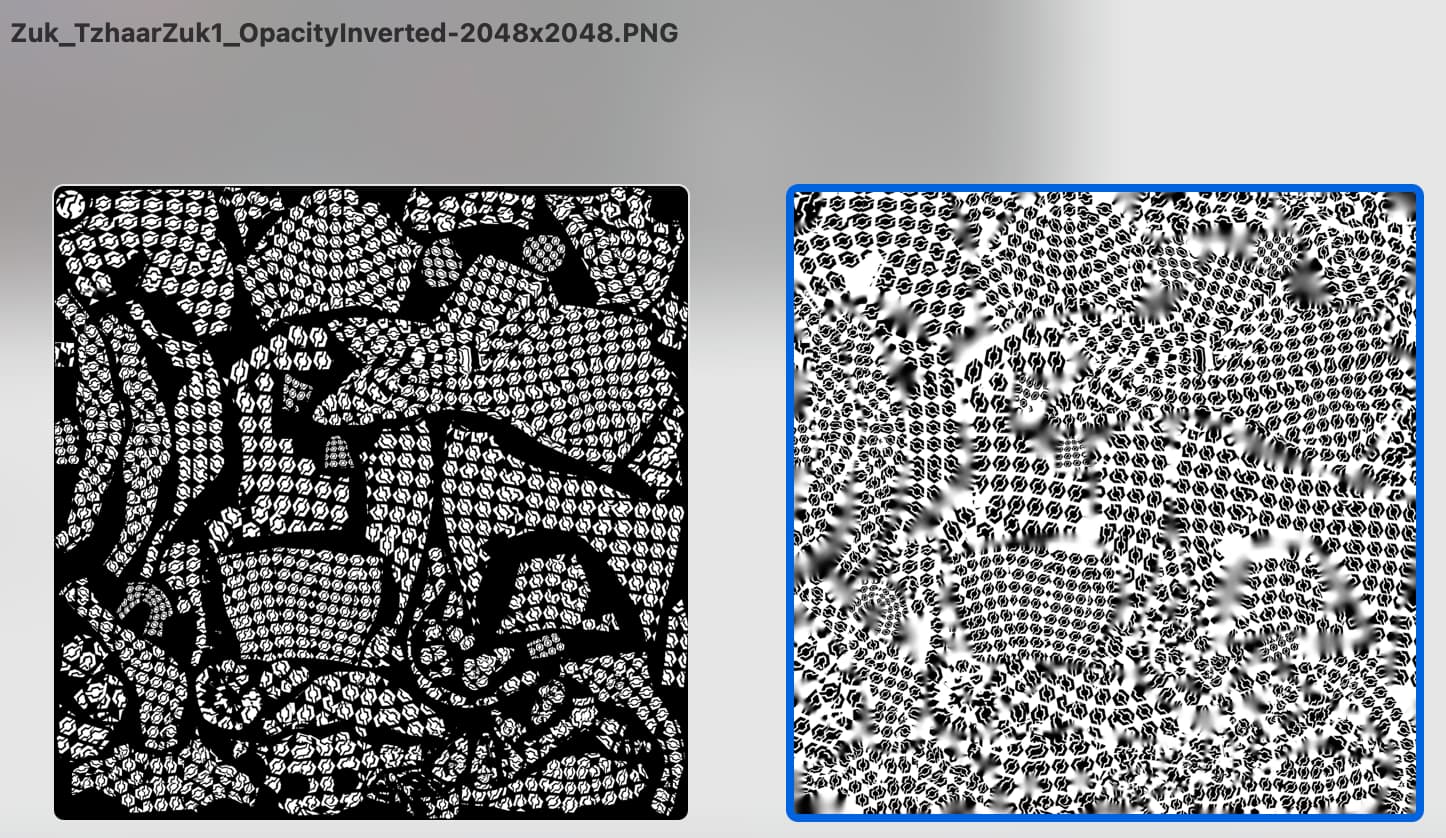
Great, that’s it. Now let’s open the export window and hit Export. Once exported, MAT created all these exports for me:
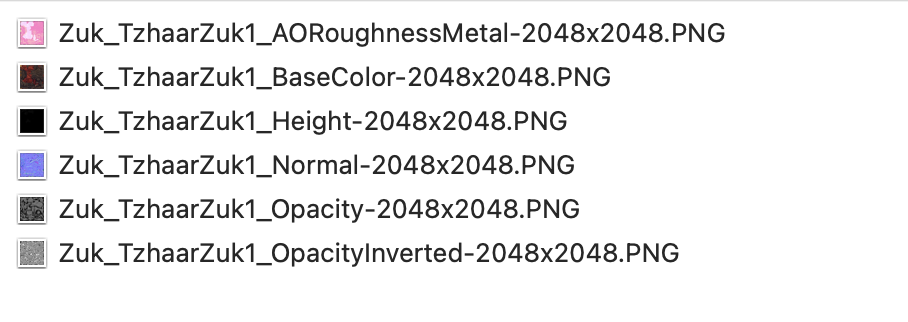
As you can see, it created both the Opacity and OpacityInverted file. OpacityInverted was run through our handmade converter!
I hope this little tutorial helps you to get started with your own converters.
You can download the converter here InvertedMaskConverter.IMP (2.5 KB)